How to Stabilise Your Caravan (And Stop the Rock, Wobble, and Bed-Bounce)
Why Your Van Still Moves When It's "Stabilised"
You're parked up. The site is level, the spirit level confirms it, all four steadies are wound down. Then your other half walks past the kitchen and the bed at the back rocks like a boat.
This is one of the most common complaints in the caravan world. And almost every time, the same questions come up: Are the steadies broken? Am I being too sensitive? Are they walking like an elephant?
None of the above. It's physics — and most caravanners are using their stabilisers wrong without realising.
The Big Misunderstanding About Steadies
Planning your next road trip?
KamperHub helps you plan routes, track weights, and travel with confidence. Free to use — no credit card required.
Get Started FreeCaravan stabilisers ("steadies" or "corner jacks") are not jacks. They don't lift the van off its wheels. They're not designed to.
The wheels still carry the weight. The steadies just stop the van rocking on its suspension by adding two extra contact points with the ground. Think of them as outriggers, not legs.
Which means: if your suspension flexes when weight shifts inside the van, the bed will move. The steadies can't stop suspension flex — they can only reduce it.
This is why the bed at the back of a single-axle van is the worst spot in the world for movement. It's the furthest point from the axle, acting as a lever, multiplying every tiny movement of the suspension.
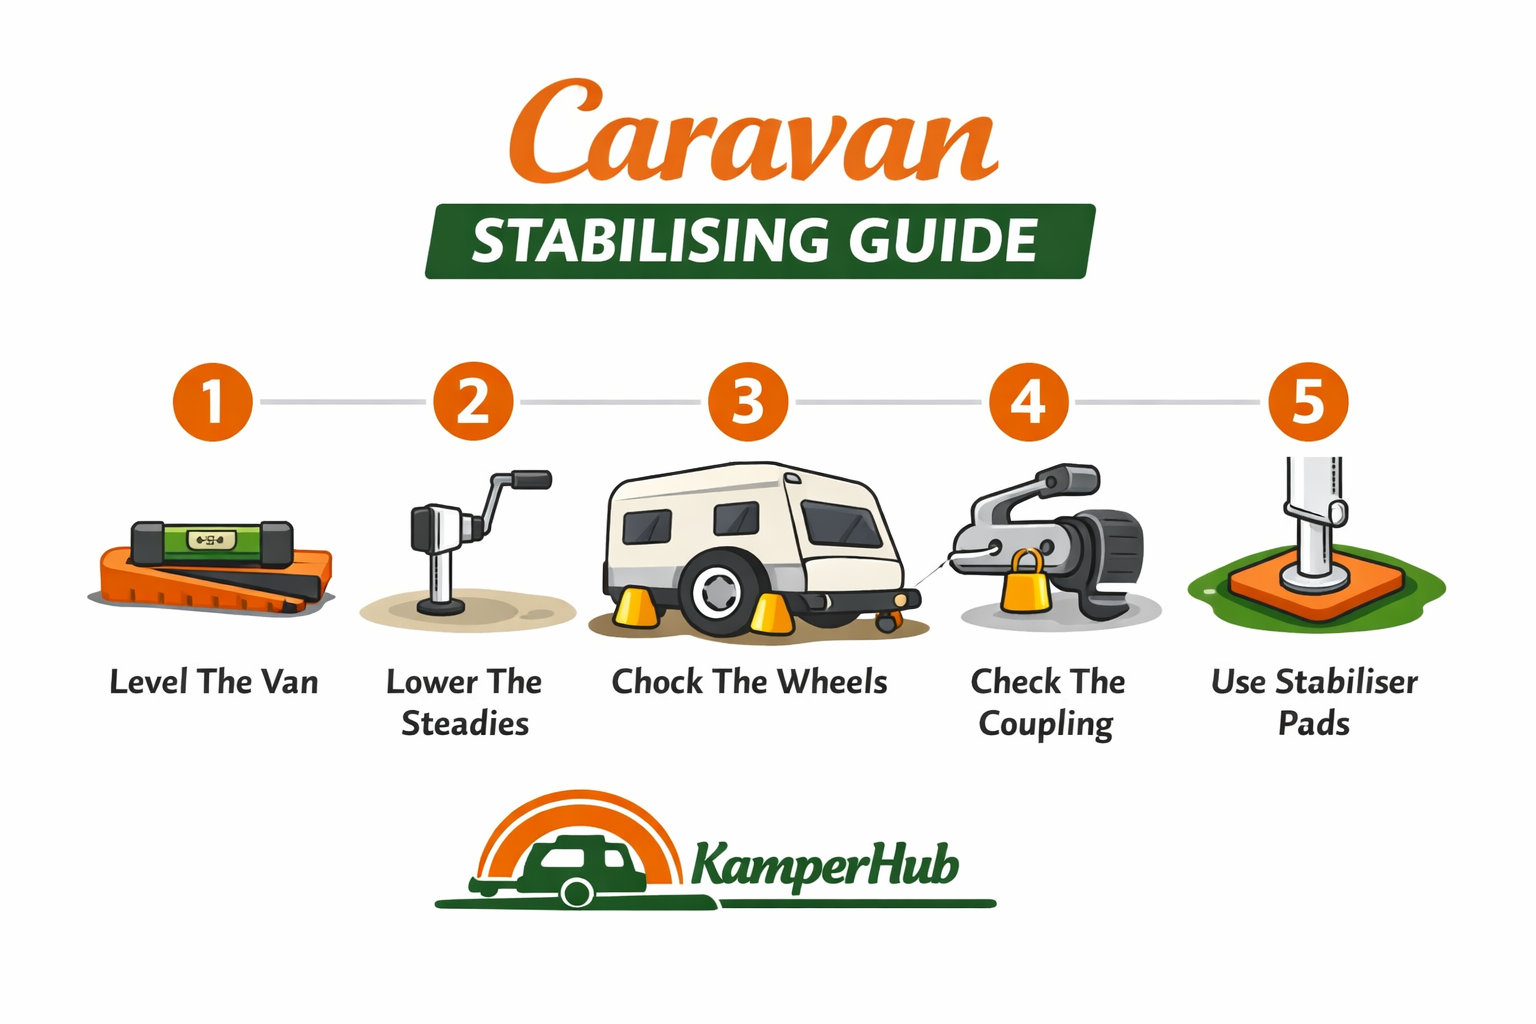
Step-by-Step: The Right Way to Set Up
Order matters. Get this wrong and you'll never be stable.
1. Park on Level, Firm Ground
Level side-to-side first using ramps or levelling blocks under the wheels. Don't try to use the steadies to level — they aren't designed for it and you'll bend them.
Firm ground is just as important. Soft grass, sand, or loose gravel lets your steadies sink microscopically every time someone walks. Use steady pads (plastic or rubber blocks) under each foot — about $20-40 for a set of four.
2. Chock the Wheels
Before you do anything else, chock both sides of every wheel — front and back. This is the single biggest stability upgrade most people miss.
Standard chocks (rubber wedges) stop the van rolling, but allow the wheels to rock backwards and forwards within the chocks. There's always a tiny bit of slop.
X-Chocks (or scissor-style chocks) are different — they wedge BETWEEN the two wheels of a tandem axle, expanding outward to lock both wheels against each other. The van can't rock at all because the wheels can't move. Around $60-80 from BCF, Anaconda, or any caravan shop.
For tandem-axle vans, X-Chocks are the cheapest, fastest stability upgrade you can make. Most people who try them say it's a night-and-day difference.
Single-axle vans can't use X-Chocks (only one wheel per side). Standard chocks tightly packed are the best option, plus the bracing kits below.
3. Disconnect the Tow Vehicle (Optional)
If you're going to leave the tow vehicle hitched, that's actually fine — the vehicle adds mass to the front of the van and reduces movement. Some people swear by it.
If you're disconnecting, drop the jockey wheel onto a jockey wheel block (a square block that spreads the load and gives the wheel a firm base). Wind it down so the front of the van is firm but not jacked up.
4. Wind Down the Steadies
Now — and only now — wind the steadies down. The order:
- Front two first (or all four roughly together — front first is just convention)
- Wind until firm contact with the ground, plus about a quarter to half a turn
- Don't over-extend. Over-tensioned steadies actually flex MORE under load, not less. They become a long lever
- Check each one is taking weight — if you can rock the van, one of them isn't seated
If you're on uneven ground, you may need a steady pad under one or two of them to take up the gap.
The Upgrades That Actually Work
If you've done all of the above and the van still moves more than you'd like, here are the upgrades worth spending money on, in order of effectiveness:
1. X-Chocks — $60-80 (tandem only)
Covered above. Cheapest and best return on investment.
2. JT's Strong Arm Jack Stabiliser Kit — $250-400
Diagonal steel braces that bolt between each steady and the chassis, triangulating the corners. Stops the steadies flexing sideways under load.
Made specifically for the bed-bounce problem in single-axle vans where X-Chocks aren't an option. Most owners say the difference is dramatic.
Fitting takes a few hours with basic tools. Many caravan repairers will fit them for $150-250 labour.
3. Better Quality Steady Pads — $20-40
If you're using thin plastic pads or wood blocks, upgrade to thicker rubber or composite pads. Even on hard surfaces, they prevent the steady foot from twisting and slipping.
4. Anti-Sway Hitch Locks — $50-150
A locked, weight-bearing hitch coupling adds a fifth contact point at the front. Some hitches (DO35, Treg, McHitch) lock more positively than others — if you can rock the hitched van, the coupling has play. Hitch lock pins help.
5. Replacing Worn Steady Mechanisms — $40-150 each
On older vans, steady gearboxes wear out. If you can wind a steady all the way down and it still has visible vertical play, the internal mechanism is shot. Replacement units are cheap.
Common Mistakes That Make Things Worse
Using the steadies to level the van. Bends the steady arms, voids the warranty, and creates uneven loading. Always level with the wheels first.
Winding the steadies down too tight. People assume more pressure = more stability. The opposite is true past a certain point. Over-tension flexes the chassis and amplifies movement.
Skipping wheel chocks because the steadies are down. Steadies don't stop the van rolling. They stop it rocking. Different problem.
Soft ground, no pads. Even firm-looking grass compresses with foot traffic over hours. Pads under each foot are essential.
Forgetting the jockey wheel. A wound-up jockey wheel + hitched van = stable. Disconnected van without the jockey wheel firmly down = the front swings every time someone moves.
Single Axle vs Tandem Axle
If bed-bounce is your number one frustration and you're shopping for a new van, tandem axles are noticeably more stable than single axle. Two axles distribute weight transfer over a longer wheelbase, and X-Chocks become an option.
This isn't a reason to swap vans, but it's worth knowing: single-axle vans need extra bracing (Strong Arms, etc.) to feel as stable as a stock tandem.
Slide-Out Vans and Pop-Tops
Slide-outs add weight to one side of the van and change the centre of gravity once deployed. Re-check level after the slide is out, and add an extra steady pad under the corner that's now carrying more load.
Pop-tops are usually fine — the roof going up doesn't shift weight much. Standard setup applies.
When None of This Is Enough
If you've done everything above — level, chocked, X-Chocked, Strong Arms fitted, pads under steadies — and you can still feel significant movement, check:
- Suspension wear. Tired shockers or worn leaf-spring bushes flex more. Inspection at a caravan service shop
- Chassis cracks. Rare but possible on older vans, especially around the A-frame and steady mounting points
- Loose internal cabinetry. Sometimes the noise sounds like the whole van moving when it's actually a cupboard door rattling
The Bottom Line
Level with the wheels, chock both sides of every wheel (X-Chocks if tandem), drop the jockey wheel firm, wind steadies down to first contact plus half a turn — don't over-tighten. If the van still bounces in single-axle setup, fit JT's Strong Arms.
The perfect setup takes about 10 minutes once you've done it a few times, and it's the difference between sleeping through someone making a coffee at 6am and being woken every time they shift their weight.
Plan your trips with [KamperHub](https://app.kamperhub.com) — we'll handle the route, packing, and weight checks so you can focus on the setup-up and tear-down.
Useful Resources
Join the Conversation
Found this helpful? Try KamperHub — it's free
Weight tracking, trip planning, and towing compliance — all in one app.
KamperHub Team
Helping travellers tow safely and confidently. KamperHub provides tools for trip planning, weight compliance, and adventure management.
Plan Your Next Caravan Adventure with KamperHub
Trip planning, weight tracking, fuel management, and more. Everything you need for safe and confident towing.
Get Started Free